Edit using TONE CURVES in Lightroom
I’ve never been a fan of the tone curve. Even when I used to do a majority of my photo editing inside of Photoshop, I rarely used curves and would instead stick to Levels, or simple Brightness and Contrast adjustments.
Over the last year I’ve come to appreciate just how powerful the Tone Curve panel is within Lightroom; not only for creating contrast, but for manipulating colour within your images.
What is a Curve?
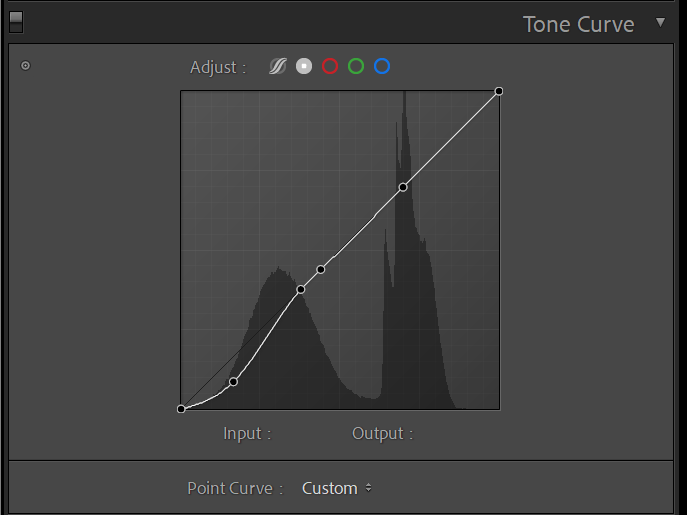
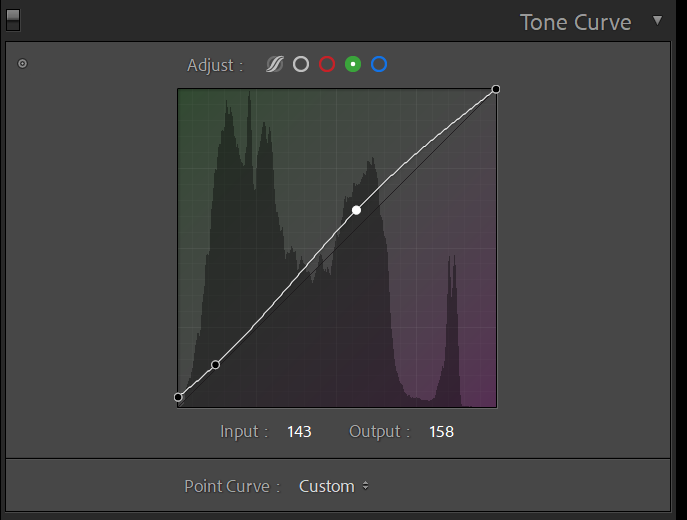
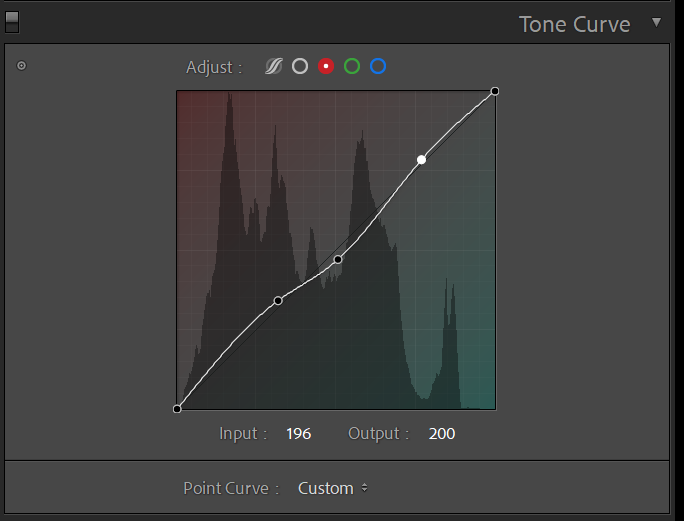
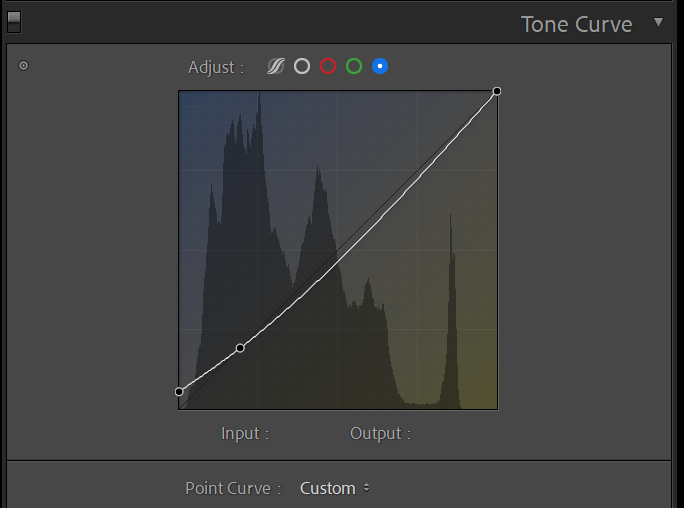
A [tone] curve is a visual representation of the data contained within your image. In the latest version of Lightroom, Adobe added colour overlays inside each of the red, green, and blue channels to make it much more apparent how modifying these curves affects the colour within your image.
Every pixel in your image is made up of 3 channels, those being: red, green and blue or [R,G,B]. Each colour “channel” contains a value between 0 and 255. “0” represents pure black (or no colour) and “255” represents pure white (or full colour) with “127” being neutral grey. That means if you could somehow open up and read the colour data inside of a single pixel, you would find 3 numbers. A 100% red pixel, for example, would read like this: [255,0,0]
Colour and Brightness
Looking closer at the tone curve, you will notice Input and Output. If you scroll your mouse along the tone curve, you can watch these values change from 0 to 255. The X-axis represents input, and the Y-axis represents output. If you click and drag a point up, it takes an input value and brightens it up. If you click and drag a point down, it takes an input value and darkens it. This principle can be applied to each of the Red, Green and Blue channels, or the overall Tone Curve, allowing you to “re-map” both colour and brightness inside of your image!
The Tone Curve panel, and point curves are great ways to find your signature editing style or even synchronize the look of your photos for a consistent Instagram grid.
(See video above for a complete breakdown of the Tone Curve)